I found several posts about configuring Diagnostic Settings on VMs, but none that specified or included boot diagnostics.
With this Azure Policy you can automatically enable Boot Diagnostics and apply a storage account to it. This is also a great base if you want to start testing out your own policies.
1. Overview
Our process will have several major parts
- Create a Custom Azure Policy Definition
- Assign to a Subscription or Resource Group
- Find the Blob Storage URI to use
- Create a Remediation task to Apply the changes
- Optional: Link to GitHub for versioning
2.Create a Custom Policy Definition
First we will need to Create a Custom Definition. To start with head to Portal.Azure.com > Azure Policy | Definitions.
From here, we will need to create a new Policy Definition

- “Definition Location” - which will be the Subscription.
- Give it a name
- Create a custom category, or select an existing one

| |
3. Assign Policy to Resources
Next you can select a Resource Group or entire Subscription to apply to.
By default, the JSON policy provided will ignore any resources with the tag IgnoreBootDiagnostics, but you can also add Exclusions here, as well.
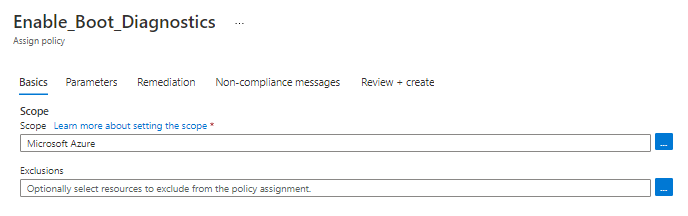
For the parameter, you need to fill in the URL to a Azure Blob storage service.
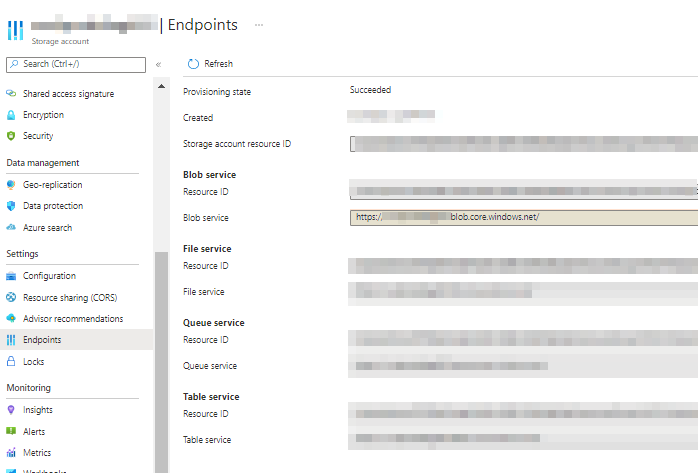
Get your Blob Storage Endpoint
My example is https://YourBlobStorage.blob.core.windows.net , but you can find the endpoint for your Storage Account by opening your Storage Accounts > Select or Create Relevant Storage account > Settings > Endpoints
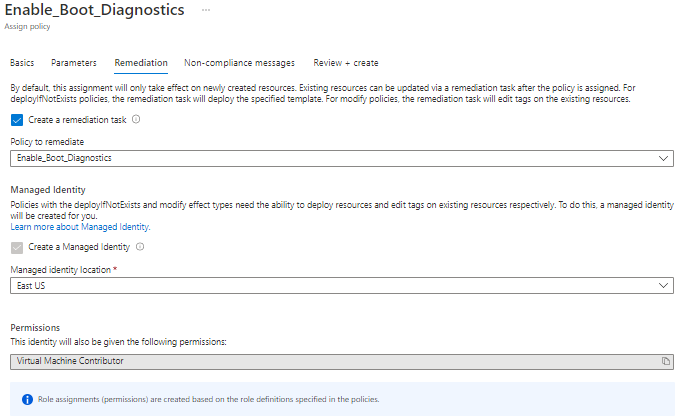
4. Create Remediation Task
Part of the assignment process will give you the option to create the Remediation Task.
Since the policy specifies the access needed, it will default to creating a managed Identity to remediate the issues.
Without the Remediation Task, the Policy will just Report Compliance or failure, but you can always start with no Remediation and then add it back later.
5. Be Patient and Enjoy
In my experience, the policy will take around 15-45 minutes to evaluate, depending on the amount of resources it is checking over.
From there it usually takes another 30 minutes to multiple hours before the remediation runs. These are not the most immediate methods to apply the policy, but they can be fully automatic!
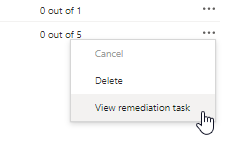
You can check your Remediation status by going to Policy Assignments> Select your policy name > Remediation tab
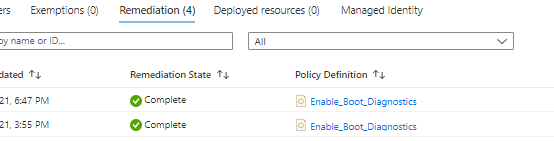
To see the details, use the three-dots menu on the right to View remediation task
6. Optional: Export to GitHub
Modifying the Azure Policies can be a highly iterative process, so being able to reference or revert to previous versions can be an enormous benefit.
Azure Policies has this built in, including Automated Deployment from GitHub with GitHub Actions! You can read more about that here, but the basic process is shown below.
Open Azure Policy Assignments > Select your assignment > View Definition button near the top > Export Definition button
From there, you will need to authorize a connection to a GitHub account with rights to the Account/Repo you want to store the policy in.
Now, I would mention the important difference that the GitHub repo stores the Rules, Parameters, and any remaining parts into separate files within that Repo. Don’t be surprised that it took your glorious new policy and chopped it up into different sections, and fills out a few metadata attributes.
If you aren’t familiar with GitHub Actions, the export process will create a .github/workflows/manage_azure_policy_xxxxxx.yml that will outline the Workflow and use secrets to securely connect back to Azure.
To make future changes, commit them to the Repository and the GitHub Action will try to build the policy, apply it, and let you know if it was able to apply successfully.
Kevin Crouch Contributor

System Administrator